A Beginner’s Guide to Feeding Your Backyard Chickens

Share on Pinterest

Feeding ChickensBackyard chickens make great pets. They are surprisingly intelligent and sociable. They are easy to care for. They eat pesky insects and table scraps, and they are a great source of food themselves, whether you raise them for eggs or meat. However, these birds need more than just table scraps and insects to be healthy and productive. Learn what to feed backyard chickens at each age and stage.
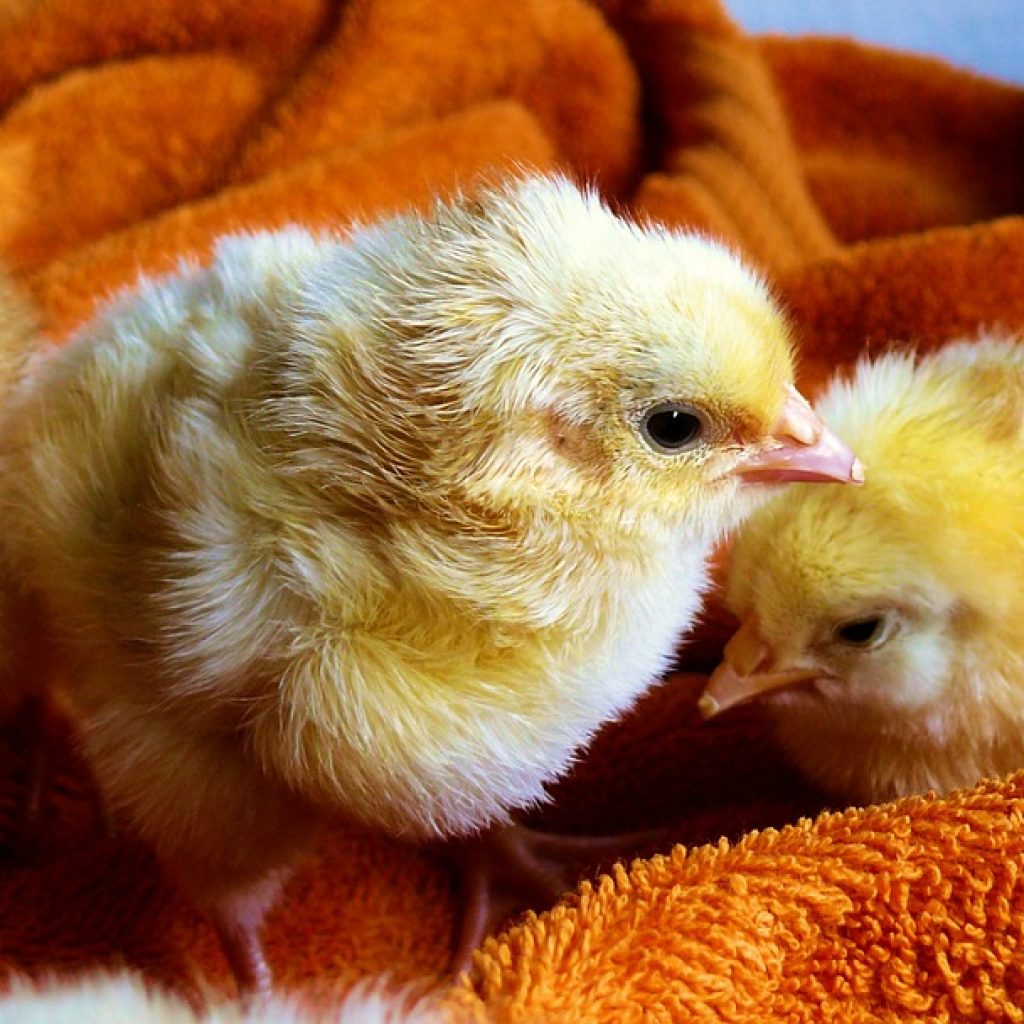
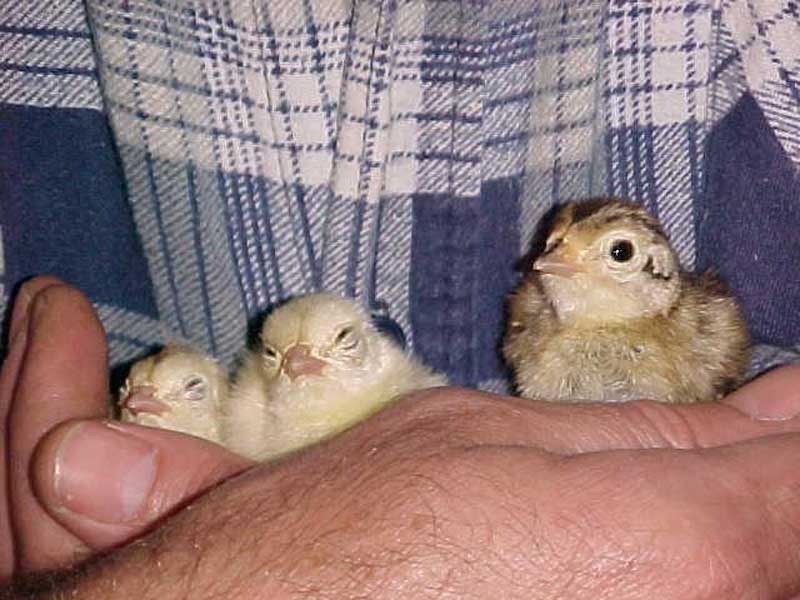
Chicks

Chick feed comes in two types: mash and crumbles. They are equally beneficial. Vaccinated chicks should be given non-medicated feed. For birds that have not been vaccinated, medicated feed can guard against illness.

If your chicks will be meat birds, they’ll need a high concentration of protein in their diet. Choose a feed that is 22-24 percent protein, called “meat bird starter” or “broiler starter.” Chicks destined for laying should be given a lower protein feed, no higher than 20 percent.

Laying Hens

Chicks can be given starter feed until they lay their first egg. After that, they need extra calcium to create eggs with strong, healthy shells. Switch to calcium-enriched layer feed or supplement all-flock feed with ground oyster shell, limestone or eggshells. Non-layers, including meat birds and broody hens, should not be given layer feed or added calcium, as it can cause gout, kidney damage and other health problems.

Broilers

Broilers, also known as meat birds, need extra protein right from the start to grow to a satisfying size for eating. Chicks should be given unlimited starter feed for three to four weeks, then switched to adult meat-bird pellets. Once they’ve graduated to adult food, allow them free access to unlimited feed for 12 hours a day, and then remove the feed for 12 hours. Meat birds need to consume a lot and will eat more feed each week as they grow.

Grit, Grains and Garbage

Chickens are omnivores and enjoy a wide variety of foods, including grains, fruits, vegetables, insects, and even snakes and lizards. They have a natural instinct for scratching, and grains can be scattered in the yard for a fun activity that yields a special treat. They also enjoy table scraps, chicken scratch and mealworms, though these snacks should make up no more than 10 percent of their daily calories.

While it’s ok to share your food with your chicks, some foods are toxic to them, including

  • Avocados
  • White potatoes
  • Tomato leaves
  • Apple seeds
  • Rhubarb
  • Onions
  • Chocolate
  • Fried foods

Fortunately, most kitchen scraps are perfectly safe for chickens. Stale, wilted and overripe foods are all acceptable; moldy food is not. Citrus fruits, garlic and asparagus won’t hurt your chickens, but they may taint the flavor of the eggs and should be limited.

Chickens also need grit to help them digest their food. If they are allowed to roam and scratch in an area with dirt, gravel or sand, this can satisfy that need. Otherwise, you may need to add grit to their feed or sprinkle some with their scratch.

Backyard chickens are easy to feed and easy to care for. If you’re ready to start a flock of your own, we can help you get started. Download our free guide to building your first chicken coop, then select a plan that suits your needs. You’ll be amazed at just how rewarding backyard chickens can be!

Chicken Coop Cleaning: 5 Tips for a Healthier Coop

chicken coop cleaning
Share on Pinterest

While you might love raising chickens, you may not have as much affection for cleaning the chicken coop. The good news is that ChickenCoopGuides.com has a few tips for chicken coop cleaning without cutting corners or putting the health of your birds at risk. So be sure you check out this guide before you next go to scoop out the coop.

Use Hay

Rather than using only dirt to cover the bottom of the chicken coop, add barn lime and hay to the dirt to keep bacteria at bay and reduce health complications in your chickens. The great thing about hay is that it doesn’t lead to a buildup of dust, and another great thing is that it’s inexpensive. As for the barn lime, it helps chickens create shells for their eggs.

Be As Thorough As Possible

When it’s time to take care of shavings, manure, feathers and anything else inside of your chicken coop, it’s vital that you’re thorough. White vinegar and hot water make for a great combination, and you can also hose down the coop to spray out dust and make it easier to scrape away stubborn spots. Just be sure you let the coop fully air out once you’re done cleaning.

Use Dropping Boards

You know you’ll find plenty of droppings in the coop, so you might as well do what you can to make this cleanup step easier. Dropping boards are easily installed under the coop and are great for catching droppings and keeping bedding cleaner for longer. Know that you’ll still need to give the dropping boards a good scrubbing and cleaning every now and then. Once you start using dropping boards, you’re sure to notice how much money you save on bedding, not to mention the time it takes to install bedding.

Keep a Duster Handy

While hay can go a long way in keeping coop dust at a minimum, there’s bound to be at least a little bit, especially if you have young chicks. It’s a good idea to buy a high-quality duster specifically for the coop. Wipe down the window dressings and nest box curtains, and give the walls a dust down whenever they need it. Each time you do this, you’re making it easier on yourself when the time comes to perform your deep cleaning of the coop.

Use the Deep Litter Method

Are you raising chickens in a cold climate? The deep litter method is exactly what you and your birds need to remain comfortable. What’s so unique about this method is that it makes it easy for your litter to compost over time, and as an added bonus, the buildup keeps the chickens warm during the colder months of the year.

The deep litter method requires you to spread barn lime, which also helps discourage flies from buzzing around. Next, add anywhere from four to six inches of hay. Make it a weekly habit to mix up the litter and add more lime and hay as needed.

While these tips may not make it a joy to clean the chicken coop, they can most certainly make it easier.

How to Train Your Dog to Protect Your Chickens

dog protecting chicken
Share on Pinterest

Chickens kept in rural areas can be in danger from local predators. Because you don’t want to patrol 24/7, having a dog to help protect your flock can be beneficial. While certain breeds are known to be good at guarding chickens, the best dog to protect chickens is one that is well trained to the task. Here are a few useful tips for training in general, as well as some for specifically training a chicken protector.

Teaching Basic Commands

If you are training the dog yourself, start with basic commands before going into the more specific task of chicken guarding. Commands like sit, stay and come are common to dog training, but one that is especially important for poultry is leave it. It’s important to remember that training a dog requires the right balance of positive and negative reinforcement, so starting with the basics can build a good bond between you and your dog for when you deal with more complex tasks. Make sure you have all the proper equipment for training, reduce distractions and understand the basics of canine psychology before you begin.

Desensitize Your Dog to Chickens

New sights and smells can excite dogs and make them less responsive to commands. When you start the process of desensitization, do so with as few distractions as possible. One way is to use a fenced in area where your dog and your most docile chicken can interact with each other. If the first few tries don’t go well, work on just the smell. Rub down a chicken with a damp cloth and leave this in your dog’s bed or pen. A desensitized dog can learn to be the best dog to protect chickens.

Teach Your Dog Who the Chicken Predators Are

When you make your rounds to fend off chicken predators, take your dog with you. They can quickly understand which animals you don’t want around when you use this method. When you reward them for noticing predators, such as foxes, chicken hawks and crows, they will learn this to be one of their jobs and handle it with typical canine dedication. The best dog to protect chickens knows how to interact with these birds but also how to keep away animals that pose a danger to eggs and chicks.

Other Chicken-Specific Tasks

To round out your dog’s training, there are some other chicken-specific tasks your dog can learn. One is to break-up rooster fights. Fights among birds can reduce your egg haul from injury and stress, so when your dog can help handle these fights, you can have a healthier and more productive flock. A safe way for a dog to break up fights is to run at but not chase, the offenders or to howl repeatedly.

If you get frustrated, keep in mind that certain breeds are better at this than others. Dogs that are bred to hunt birds, such as spaniels, pointers and retrievers, are not the best dogs to protect chickens. Sheepdogs are very well suited to this task, but other breeds can also learn the proper commands and actions.

Put these tips to good use when training a dog to watch over your chickens. Proper rearing and adequate attention are sure to pay off for your chickens and your egg production.

Chick Hatchery Guide: Get Started With Day Old Chicks

Share on Pinterest

Hand in hand with our previous article about armchair gardening we put together a handy list of hatcheries for those looking to start raising themselves some fine feathered friends. Believe it or not, hatcheries routinely ship chicks across the country via USPS — you just have to be willing to order a minimum number required by the hatchery.

chicks-573377_1280

Now is a great time to start raising baby chicks provided you have a warm, draft-free environment. We’ve made sure to include the name, address, phone number, URL, and any thoughts we have about the assorted hatcheries listed below.

Cackle Hatchery
http://www.cacklehatchery.com/
411 W Commercial St
Lebanon, MO 65536
417-532-4581
Email: cacklehatchery@cacklehatchery.com

Fairly old and well-established hatchery that is smack dab in the middle of the country. They frequently have sales and have a good reputation. They also have a wide selection of bird types including many rarer ones.

Country Hatchery
http://www.countryhatchery.net/
P.O. Box 747
Wewoka, OK 74884
405-257-1236
Email: info@countryhatchery.net

A nice, friendly little hatchery that loves to help you select the very best for where you are. They state that they are an old-fashioned business that answers phone calls and they’re right!

Ideal Hatchery
http://www.idealpoultry.com/
P.O. Box 591
Cameron, TX 76520-0591
254-697-6677
Email: sales@idealpoultry.com

Email is manned by real people who actually know about chickens. Very helpful and friendly. Quality is great. Carries: chickens, ducks, geese, turkeys, bantams, guineas, pheasants, partridges.

Meyer Hatchery
https://www.meyerhatchery.com
626 State Route 89
Polk, OH 44866
888-568-9755
Email: info@meyerhatchery.com

This is pretty much the standard, go to hatchery on the East Coast and Midwest. That being said, they’re good and they will ship small numbers of chickens during the warm season. They have great customer service by phone, never emailed.

Murray McMurray Hatchery
https://www.mcmurrayhatchery.com/index.html
PO Box 458, 191 Closz Drive
Webster City, IA 50595
800-456-3280

Carries started pullets, meat – everything, including “special packages” – a specialty order that contains several types of poultry geared towards a specific purpose, such as the Frying Pan special or the Top Hat.

file0001436451068

And here are some other well known hatcheries that we haven’t personally dealt with:

Belt Hatchery
http://www.belthatchery.com/
7272 S. West Ave.
Fresno, CA 93706
Phone: 559-264-2090 / Fax: 559-264-2095
Email: orders@belthatchery.com

Phone, fax and email orders (no online orders). There is an extra charge if you order more than one breed to meet the minimum requirement. They maintain their own breeding flocks.

Dunlap Hatchery
https://www.dunlaphatchery.net/default.aspx
Box 507 – 4703, E. Cleveland Blvd.
Caldwell, Idaho 83606
208-459-9088

Established in 1918, they have a store as well and do phone orders, MO and checks.

Hoffman Hatchery
http://www.hoffmanhatchery.com/
P.O. Box 129
Gratz, PA 17030
717-365-3694

Started in 1948 with one small Sears-Roebuck incubator. Family-run business. Only accepts checks and money orders. Orders must be mailed in.

Hoovers Hatchery
https://hoovershatchery.com/
P.O. Box 200
Rudd, IA 50471
1-800-247-7014
Email: sales@hoovershatchery.com

Established 1944. Free shipping, rare breeds, meat birds, bantams.

Ideal Poultry
http://www.idealpoultry.com/
PO Box 591
Cameron, TX 76520
254-697-6677

Minimum order $25.00. Accepts Paypal. Claim to be the largest supplier of backyard poultry in the United States, shipping close to 5 million chicks annually. Offers surplus chick bargains and make your own mix.

Moyer’s Chicks
http://www.moyerschicks.com/
266 E. Paletown Road
Quakertown, PA 18951
215-536-3155

Started in 1946. They hatch out year-round. They sell their own hybrid cross chickens.

Myers Poultry
http://www.myerspoultry.com/
966 Ragers Hill Rd.
South Fork, PA 15956
814-539-7026

150+ varieties. Payment information must be phoned in.

Purely Poultry
https://www.purelypoultry.com/
PO Box 466
Fremont WI 54940
920-472-4068

300+ breeds of chickens, bantams, ducks, geese, turkeys, guineas, peafowl, pheasants, ornamentals, chukars, swans and quail.

Ridgeway Hatchery
http://www.ridgwayhatchery.com/
615 N. High St., Box 306
Larue, OH 43332
800-323-3825

In business 93 years. Orders are placed online and then you call in your payment information.

Sand Hill Preservation Center
http://www.sandhillpreservation.com/
1878 230th Street
Calamus, Iowa 52729

“We are doing this as a hobby business service and we work as fast and efficiently as the time allows. If you are impatient and absolutely have to have something by a certain date, please do us and yourself a favor and order from somewhere else.” Linda and Glenn run this as a labor of love.

Schlecht Hatchery
http://www.schlechthatchery.com/
9749 500th Avenue
Miles, IA 52064
563-682-7865
Email: poultry@schlechthatchery.com

Smaller selection but they do all of their own breeding.

Welp Hatchery
http://www.welphatchery.com/
PO Box 77
Bancroft, IA 50517
1-800-458-4473

Started in 1929. Broilers are specialty. Accepts money orders. No additional shipping charges.

Do you have a favorite hatchery or have a comment about one listed here? Tell us about it in a comment below!

Garden Planning For Beginners

Share on Pinterest

Why plan your garden ahead?

Here you are, stuck indoors with only the memories of your bountiful summer garden. Or maybe in reality it wasn’t such a bountiful garden…those tomatoes never did really produce well. Or maybe you had wanted to start a garden – you had thought about it, talked about it but just never quite got around to it…Now’s the perfect time, no matter what last year’s situation was, to send away for a stack of catalogs, curl up in a cozy chair and start your next year’s garden planning.

There are endless possibilities for this coming year. Garden planning is relaxing. When my catalogs arrive in the mail, I feel the same excitement I did as a kid when the Christmas catalogs came in the mail (anyone remember the Sears Roebuck, Montgomery Ward and Miles Kimball catalogs?). And if you hate the paper, no worries, you’re not left out because almost every company offers their catalogs online as well. Not only is it relaxing but done wisely, it can result in a better garden, with more variety and better yields.

Which brings us to a warning we feel obligated to mention (lawyers may be involved here): be careful while browsing! You do know what happens when you take your four year old to the toy store? Just so you know – it can be easy to get carried away.

Do you know how many seed catalogs there are out there?

Some catalogs are more informative than others and that’s a good thing to look at as you’re browsing. As someone looking to buy seeds, you want to have a good description of the plant you’re going to grow. You need to know how big it will get, how far apart to plant it, how long it takes to sprout, and when it will actually produce fruit. Does it grow well in the heat or the extreme cold? Is it prone to diseases in damp weather? If I tend to have a late frost in May, I want to grow a variety that can withstand it; if my August temp’s are over 90, my plants have to make it through. A good catalog is going to give you information on this. You need to know something about what that particular variety can and can’t tolerate to make a good, educated choice.

There are catalogs for everything you can imagine – and things you had no idea even existed. We’re going to give you a list of some of the best general catalogs out there as well as a few specialized ones. Some of these companies are big; some of been in business for a long time; some are small or are relatively new to the market. All have good reputations and have something that makes them unique.

It can be worth it to go with a specialized catalog if you’re really passionate about growing a particular item. If it’s a long-term investment of either your time or money, such as a fruit tree or asparagus, it’s best to shop around and do your research on what will work best in your area. A company geared towards either those specific plants or your region is the best way to go.

Are These Seeds Safe? 

There’s a big list of companies who have voluntarily taken what’s called The Safe Seed Pledge. This means they’ve decided they won’t sell genetically modified seeds – they’ve pledged that the seeds they sell don’t contain genetic material from other species and that they’re committed to selling seed we can save and use to grow again instead of having to go back to the owner of the seeds to get more. You can get more information about the pledge here: http://www.councilforresponsiblegenetics.org/ViewPage.aspx?pageId=261

If you want to save your own seeds, you’ll look for Open Pollinated or Heirloom varieties. A lot of times these are abbreviated in catalogs as (OP). When you grow these, as long as you’ve taken care that they don’t cross breed with another variety, you can save the seeds and plant them next year. It’s a fun project and can not only save money but can help you develop seeds that are adapted to the very specific climate you’re growing in. Heirloom varieties are also living history – some of these have been grown for hundreds of years; some were unique to a certain region or family. There’s a lot of interesting stories around some of them. They preserve genetic diversity at a time when a few big seed companies want to license and patent seeds so growers are forced to purchase a few varieties from them year after year.

The other type of seeds is hybrid. There’s nothing wrong with buying and using them and in some cases, hybrids may be an easier choice for a particularly challenged environment because they can be bred with specific disease resistances. That’s no guarantee but it can be a help. Weigh out all of your options and see what works the best for your situation.

So Now What?

So now you’re prepared to spend a few pleasurable hours browsing. Don’t make this a rushed thing; enjoy it and take your time. Just thumb throughGrow Best Tomatoes and dog-ear pages or circle things you like as you go through the catalogs. It’s okay – go ahead and be a glutton! We’re going to put these aside for a few days and make a reasonable, realistic plan before you actually spend any money.

When you’re ready for a second look, make a real assessment of the actual garden space you’ve got and what you need and want to plant. Now’s the time to be realistic. You can’t plant all of your corn and potatoes for the year if you have a 10 x 10 foot space. Don’t decide you’re going to grow all of your tomatoes to supply sauce and paste for the year if you work 60 hours a week and have three children under the age of 4. If this is your first garden, don’t decide to plant one of every vegetable. Make this a successful experience from the start by being realistic. We all bite off more than we can chew but keep it within a reasonable limit.  If you want to go crazy, buy some extra radish or lettuce seeds; you’ll find a place to tuck them in and they won’t go to waste, even if they aren’t used this year.

Check your work

Once you’ve decided what you want and need to grow, go back and work through the catalogs you really liked. Pick a vegetable to start with, say for example tomatoes. You may want to make a list of the varieties that really caught your attention. Maybe you want to plant a paste tomato, a yellow tomato, a big ol’ beefsteak and some tiny ones for snacking. Use that general plan and narrow down your choices. Make a list by those categories and then weigh the pro’s and con’s with each selection on your list. Maybe one paste tomato matures faster; maybe one has less seeds. Take a look at things like days to maturity, your climate, the amount of space you have, the flavor description, and what you want to use it for. Now you’ve got to make the hard decisions. Some varieties should rule themselves out easily: if you live in Zone 5 and that tomato you liked takes 110 days to maturity you should probably cross it off the list and find something that matures faster. Make a note of which catalog offers that variety and the price – there can be significant differences.

Sometimes it can pay to order all of your seeds from a single source, depending on how the shipping and handling fees are set up. But if there’s something you really want, it can be worth it to figure out what else you can buy from that company to justify the shipping cost.

Is that all there is to it?

After you’ve gotten all of your essentials planned out and decided upon, you can give yourself permission to go back and look for the little fillers or “fun” items. Maybe there’s a new flower you want to try? Never planted gourds before? Maybe you want to add a few unusual herbs in between plants? This is where you can be creatively inspired by the catalogs and all of the things they offer that are really unique. You may end up with a new discovery that becomes one of next year’s “regulars”. Good things to look for as easy additions are “off-season” vegetable (early spring or late fall), small varieties you can tuck in among your regular beds (lettuces, herbs, greens and flowers) or container plants.

Have fun and relax with this even as you’re making your plan. Its part window shopping, part daydreaming and part just good old garden planning. When it comes time to start those seeds, either indoors or out, you’ll be ready.

As you get more into reading the catalogs and trying different offerings year after year, you may find yourself coveting a particular variety or a particular vegetable. You look at the catalog and get upset because the green beans you had ordered last year (and loved!) are no longer being sold…while there are always tried and true varieties offered, you can also count on something new appearing every year. Maybe that’s what keeps us hooked. That and the hope that this will finally be the year without the bugs, the weeds and with the gorgeous, bountiful harvest.


Do you have any tips you’d like to share? A favorite seed catalog we missed? Something you’d like more clarification on? Leave a comment below and we’ll get back to you.

Some good catalogs:

General Catalogs

Photos courtesy of biodiversitylibrary.org/page/46265451

Winter Poultry Care

Share on Pinterest

800px-Hens_in_the_snow

Now that most of us are starting to feel the chill of winter we’ve made sure we have a cozy warm environment for ourselves. But what about your chickens? How are they holding up?

Ideally, your chickens have gradually gotten used to the cold as temperatures began to cool down throughout the fall. Overall, chickens are pretty hardy and naturally well insulated enough to handle winter. It’s the extreme – or sudden and unexpected temperature drop – that can really cause the problems.

That said, you do want to make sure your coop is draft free but still has some ventilation to get rid of moisture that builds up. If there are drafts or you get hit with a couple of sub-zero days, consider covering the north and east facing sides with temporary insulation, such as the plastic you use for windows, old tarps, blankets, quilts, corrugated cardboard, or bubble wrap (I’ve personally found that bubble wrap works better than the plastic kits sold at the hardware store). You can get inventive here and experiment with different materials you might come across. If you have a chicken run, put up a temporary wind block on the north and east sides as well. Again, this can be as simple as cardboard. Do keep in mind: chickens love to eat Styrofoam (go figure – never been tempted to try it myself) so if you use it, cover it with something. It won’t hurt them but you’ll end up with no insulation very quickly once they discover it!

If you’re desperate and don’t have electricity in your coop, you can fill plastic bottles or jugs about 75% full with very hot water. Don’t fill them completely so they’ll have room to expand if they freeze. Secure the lids and put them in the coop. They’ll provide a little extra heat for a short time.

Make sure your coops are predator proof since there’ll be hungry varmints on the prowl this time of year and make sure your feed is secured from rodents. If I was a rat and I knew there was a big bin of chicken feed I’d go for it so lock it up tight and in something that is chew proof, like a galvanized metal tin of some sort. Usually they are easy to find at the farmer supply stores.

Your chickens may not be able to get their usual dust bath due to frozen or muddy earth, provide them with an area filled with either wood ashes or sand. Throw in some diatomaceous earth to further help prevent parasites. If you’ve got the space, a shallow kid’s swimming pool works well as a container.

Since daylight hours are so short, birds spend more time on their roosts. If you use dropping boards, clean them more frequently.

Open the coop door and give your chickens the option of going out on sunny days, even if it is cold. Be aware that too much time spent standing or walking on the snow can cause frostbitten feet. You’ve probably heard before that applying Vaseline (or Bag Balm) to your birds’ wattles and combs can prevent frostbite. But according to University of Kentucky, it works in mild cold but does nothing when temperatures are sub-zero for a few days. When you do apply it, use just a thin layer. You can even coat their legs if you feel they’re at risk.

One of the most difficult aspects of winter can be dealing with frozen water. You can keep a spare one or two inside and switch them out as each becomes frozen. You can also add a mix of boiling water and cool water every few hours (the end result should be warm – not hot). Another trick is to put a warm brick or rock inside the waterer. It’s also okay to remove the waterer from the coop overnight to keep it from freezing. Your flock will be asleep and they don’t get up in the night for a snack or drink! Add a few tablespoons of apple cider vinegar to their water to boost their immune systems. Vinegar freezes at 28 degrees so it may also slow the water from freezing.

Happy hens are healthy hens. And food treats and diversions do make them happy. Not that we’d ever spoil our birds (wink!) but if you’re so inclined, cook them up a nice hot mash or some oatmeal. If you’re using the oven, roast them a squash or pumpkin. But you don’t have to cook specifically for them. Just warm up the leftovers you were going to feed them anyway. Plain yogurt (especially if you can get it cheap when it’s near the expiration date) is good. Throw in a bunch of kale, which is extremely nutritious and winter hardy plant. Hang up a cabbage for them to peck at. Offer healthy treats like sprigs of millet, sprouts (easily and cheaply grown on your kitchen counter), whole or rolled oats, and sunflower seeds. Scratching for these in the litter provides hours of fun as well. Throw in an armful of hay. You can make a homemade suet block like you’d give the wild birds by using leftover cooked fats mixed with seeds, nuts and/or dried fruits. Give them a little snack before they roost for the night and they’ll have a bit more fuel to keep them warm. Sprinkle some garlic and kelp powder on top of their food for an immune system boost.

For more ideas, check out some of our past articles and tips:

(Ventilation and Insulation Tips): https://www.chickencoopguides.com/exploring-insulation-ventilation-options/

(Fall and Winter Checklist): https://www.chickencoopguides.com/chickencoopguides-fall-winter-checklist/

(How to Winterize Your Waterer): https://www.chickencoopguides.com/winterize-chicken-waterer/

(Raising Chickens in Cold Climates): https://www.chickencoopguides.com/raising-chickens-cold-climates/

Wishing you good luck this winter,

Kim

Roosters Crow In Pecking Order

Share on Pinterest

red jungle fowl crowing

Believe it or not, there’s still a lot we don’t know about roosters crowing even though, according to recorded history, they’ve been doing it since 2600 B.C.

We all know about the pecking order of our chickens – certain ones are the “top” in the group and tend to get to the food first or get to have the best roosting spot but according to a study published in Scientific Reports in July, the top ranked rooster is the first to crow every day.

Chickens are very social animals and the theory is crowing helps to announce their territory and avoid aggressive moves from other roosters.

Tsuyoshi Shimmura from Nagoya University in Japan studied groups of roosters and determined that the rooster highest in the pecking order determined when to begin the daily pre-dawn crowing with each rooster following after in order according to their rank. When the top rooster was removed from the group, the second in charge took over and filled his job, with each subordinate rooster, again in order, crowing next.

The timing of the crows is regulated by an internal biological clock, called the circadian clock. Although it can also be influenced by things like light and the crowing of other roosters, it’s mainly this 24 hour internal cycle that determines the time of the first crow each day. The scientists concluded that when in a group, roosters suppressed their own internal clock to accommodate the social rules of the group – in other words, the pecking order. So even though the second or third ranking rooster might feel inside “hey, it’s dawn and time to crow”, they won’t do it – not until the highest ranked has started the group off. The team also noticed that the highest ranked rooster crowed more often than the others.

Busting Chicken Myths

Share on Pinterest
There are no images.

I’d like to bust some of the chicken myths I’ve heard folks tell me before. On the left are the things I’ve heard and then on the right I bust the myth with modern fact and explain why the myth isn’t the best for this particular case.


‘My grandpappy used to just dunk those chickens in turpentine or gasoline when they had mites and lice. That fixed ‘em right up!’

Yeah, I’ll bet it fixed the chicken right up. I’m sure it did also kill the mites or lice involved. Aside from being a literal walking fire hazard for a few minutes to an hour, dunking chickens in gas or turpentine is toxic to all involved. What you put on your skin gets absorbed so eggs wouldn’t be safe to eat for days. If you’re keen to use petroleum products, try Vasoline instead!

‘My grandma said that you have to have a rooster with the hens to get them to lay.’

Nope. Hens will lay all on their own. No rooster needed unless you want baby chicks. Even I used to think that roosters stimulated hens to lay more often, but I recently read that it is a myth. After doing some numbers on my own coops and compared rooster to rooster-free ones, I discovered it really is a myth. Which is a good thing for folks considering urban coops where roosters are usually forbidden.

‘Granny fed ‘em dog food. It always worked for her. We ate those eggs and we were fine! Don’t need no stuck up, city-folk… mumble-mumble…’

Dog food is not something chickens should eat on a regular basis as it is not formulated for a chicken’s nutritional needs and can make them ill after a while. I wouldn’t worry if the chickens get a few bites of your dog’s kibbles, but don’t actively feed it to your chickens. Aside from that, processed pet food is awful for just about anyone’s health. Would you really want to eat eggs from chickens who eat dog food? Most of it is made in China, where health standards are very low and a lot of profit is made by greased palms who look the other way. Anyone remember the scandal where melamine was found in dog food and baby formula?

‘We’ll just use the chicken poop straight from the chicken. Worked great for my PawPaw.’

I doubt it. I think PawPaw probably aged his chicken poop on a compost heap first before using it in the garden. Otherwise, it would burn all the plants up and he’d have a brown veggie patch.

‘We always used a light to keep chickens laying all year long. Never had any problems when I was growing up so we still do it now. The chickens are just fine.’

This one is kind of a personal bone with me. Again, I don’t believe that tradition is always right, but nature usually is (not all the time, but that’s Natural Fallacy and we can talk about that later). This is sort of a reverse example of Granny’s wisdom because if Granny had been around 120 years ago she wouldn’t have even had lights. Whereas most Grannies were born in the 40’s or 50’s and post-post-industrialization. Using lights goes way against nature. With chickens I believe the hens involved will have a shorter life, but I don’t have hard evidence on that one yet. I do know that most factory farms run through a hen as hard as they can, don’t let them molt sometimes, and perhaps this is why using lights bothers me so much. Just like keeping bees awake 24/7 with lights so they can keep producing, it’s plain wrong. Humans should be the keepers and caretakers of animals. Forcing production is not caring for our animal brethren. Every farmer has to make a personal decision about this. I strongly recommend a lot of research if you choose to use lights with your hens.

‘My granny always bought the brown eggs from the store. Said they were healthier. So I reckon I should get a brown egg layer!’

Nope, sorry. No difference between brown and white or any other color eggs.

‘Eggs are bad for you. Everyone knows they’re full of cholesterol!’

Even our own wonderful USDA has finally twigged to the fact that food sources of cholesterol do not raise blood cholesterol levels. Like much of dear Granny’s wisdom, it’s 1950’s science for a 21st century world. Even most doctors are estimated to be 17 years behind on current science discoveries.


Chicken Coop Insulation and Ventilation Options

Share on Pinterest

Now that winter is officially here, if you haven’t already (and you really should have done by now!) you need to look at your chicken coop insulation and ventilation. This is a place where everyone seems to ‘know’ the answer and yet there are a lot of wrong answers. I’m hoping to clear up some of the confusion in this area for everyone. There are a few things that you MUST do.

Have a DRY coop

Currently a good portion of the US is rainy and wet and expected to stay so for a few months. Add cold to that and you can have some very unhealthy chickens.

The cold, wet air can encourage illnesses of the head and lungs such as flu, cold, bronchitis, cough, or some of the more ‘official’ sounding chicken diseases like coryza (a bacterial cold bug). But more than just illnesses, the damp conditions will breed a horde of fungi and molds that can be very dangerous or even fatal for your flock. To prevent this, start by removing anything that can serve as a breeding ground for mold or fungus inside the coop.

  • Hay and straw usually come with their own types of molds and fungi so if they start to get damp, scrape and dump it. In wet weather I usually don’t even bother putting it in the coop to begin with.
  • Water dishes that have been repeatedly filled but never washed. Slimy mold tends to build up and then the hens are actively drinking it. Yuck.
  • In places where it is often rainy (like the Pacific Northwest) or has a long rainy season (Florida and the low areas) it’s best to make a coop that does not have insulation between the walls because unless you spray it with nasty chemicals that can outgas into your coop, it’s going to get damp and because of lack of air circulation it will stay damp which turns into mold and mildew. Possibly even the dreaded black mold that is guaranteed to get into the lungs of your flock and YOU!

Have a TEMPERATURE STABLE coop

So let’s say that in the summer your coop has good airflow, catches the breezes just right, and stays nice and dry even in the rain. Your hens are happy and productive, giving you a lot of eggs because you also give them good feed and access to fresh water and insects.

Then winter comes . . .

This same coop that worked so well during the summer months becomes a nightmare. It doesn’t keep the drafts out completely. The plastic you put up over it catches the wind and frequently rips pieces of the coop or blows away. Your hens are freezing cold and huddled together so tightly that you don’t think you could pry them apart with a stick. The water is frozen in the dish.

What do you do?

Have a FUNGUS/MOLD-FREE coop

So your hens are warm and cozy. They’ve snuggled up together against a big hay bale to keep warm and there are enough hens to generate heat that prevents them from getting cold in the 20F temperatures outside. But the air grows moist from a combination of spilled water, ammonia fumes from the chicken waste, and no ventilation. Soon the hay bale wilts and the fungal spores start to grow from inside. Even the walls themselves are growing mold and mildew from the moist conditions. The chickens start to get sick from the damp, moldy air and the fumes from their own waste.

Or you could take those warm, cozy hens you started with and keep them that way by making sure there is a good airflow from bottom to top (cool air comes in on the bottom and carries away the air that is too moist or too warm up through the roof). You can use hay bales if you want, but keep in mind that they carry a lot of fungi and molds so it’s critical to keep the air the perfect balance between moist and dry or you’ll have problems. We’ve already explored how the the temperature variations can cause problems, as well as the moisture, but try taking some additional steps to keep your flock safe in the very likely event that you aren’t perfect and will never have the perfect balance of temperature and moisture.

  • When you do seasonal cleaning, spray the walls with a light solution of vinegar and lemon, lavender, or thyme oil (thyme oil was the original Lysol…). This will help prevent mold and mildew.
  • Paint the interior of your coop at seasonal cleaning time with mold and mildew resistant paint. They have a low VOC paint that is safe for animals and humans.
  • Put a couple of drops of apple cider vinegar in your chicken water to help combat mold or fungal growth where the water gets spilled.
  • Stay on top of chicken waste, especially in the winter.
  • If you serve your flock a hot mash or peelings for a treat, make sure they eat it all and if they don’t make sure it’s cleaned out of the coop within two days.

There are several options for insulation that work for coops depending on your needs. If you live in a hot, dry area then the type of insulation you need is drastically different from someone who lives in a cold, damp climate.

HOT & DAMP (Florida, Coastal South, etc) Insulation isn’t needed, but ventilation is a must to prevent mold and fungus.
HOT & DRY (Southwest US) Insulation isn’t needed as much. Focus on keeping flock hydrated.
COLD (or COOL) & DAMP (Pacific Southwest) Light insulation since temperatures rarely go below 25F. Ventilation is important to prevent illness, mold, and fungus.
COLD & DRY (Midwest states) Insulation required, ventilation type depends on amount of chickens in coop. May need additional heat source, but usually a heated water dish will provide enough warmth unless you have very few chickens or a very large coop.
EXTREME COLD (Upper Midwest, Canada) Insulation required, ventilation depends on amount of chickens in coop. Will certainly need additional heat source.

Roll insulation works really well, but to prevent mold problems inside the walls where I can’t see it, I like to use a safe roll insulation like bamboo or recycled denim. I’m not really concerned that way if the hens peck at it a little. Just staple it up on the walls, then cover the walls with cut to fit chicken wire or micromesh

Photo by: fishermansdaughter

ChickenCoopGuides’ Fall and Winter Checklist

Share on Pinterest

Whether you’re new to chicken raising or an old hand, just knowing that winter is near can be a bit intimidating . . . unless you live in Florida where that’s the only temperate time of year. If that’s the case then you can probably tune out most of the following. Many farmers fear the cold more than the heat, when it really should be the other way around since most chickens are more susceptible to dying in extreme heat versus extreme cold.

unnofficial arrival of fall

That said, it doesn’t mean that fall and winter can’t be difficult times for your flock. Domesticated fowl started off thousands of years ago in Europe and Asia as birds who lived in the forests and fields, flying only to low hanging branches. Eventually someone got the bright idea to start keeping these wild critters since they tasted so darn good and lay eggs almost every day! But we have to remember that it wasn’t too long ago that these birds were fully able to look after themselves. So I say unless you live in Siberia somewhere (and perhaps even then) your flock should be able to keep themselves warm enough provided they have friends to cuddle with (one reason I feel it is very cruel to only keep 1-2 hens at a time) and a place that is reasonably free of drafts.

Surviving is one thing, but thriving is another and the goal of most farmers I know is for their flocks to thrive in the winter and hopefully even make some eggs. It’s my belief that nature intended the colder months to be a time for all egg-laying birds to rest and recover from the constant cycle of egg production. Also helps prevent prolapse caused by too frequent laying. For truly healthy birds, I always suggest letting them keep to their own natural cycle. You’ll have better birds and better eggs at the end. I know that many still use lights to force hens to lay and that is a choice you’ll have to make on your own after research. At the White homestead, we don’t do this and have followed a more seasonal eating pattern barring the holidays where my wife usually saves up the fall eggs so she has enough for Thanksgiving and Christmas baking.

So how do you ensure that your hens are healthy all winter long as well as comfortable?

    1. Much like when you get ready for spring, cleaning out the chicken coop is a must. Shovelling out any pine shavings or raking the sand bed – whatever your litter control method is – it’s very important that this is tended to and set up for the next few months. Do this as late as possible in the season and as soon as you have a warm break in the weather ensure that freshening up the coop is one of the first things on your list. One reason this is important is because your hens will ‘flock’ together and if you have a draft free environment then they are going to be susceptible to moisture-based illnesses, especially if you consider that the bedding will break down and create more moisture and heat. The heat will help the flock, but the moisture won’t. Depending on where you live a fan might help with this, just like it does during spring and summer. But if you live in extreme northern climes then a fan may not be prudent.
    2. Create an environment free of drafts that is well insulated. Patch any cracks or holes in the chicken coop. Break down any parts of the coop that could blow off in extreme winds or collapse with too much snowfall. While you’re at it, go ahead and knock on the flooring, walls, roof, etc. to make sure everything is secure. Poke at the siding and roof shingles so you know everything is good to go for a harsh winter without a leaky roof or walls. Look at any wiring you have set up to make sure your girls haven’t pecked through or scratched it since a frayed wire is an awful way to make fried chicken.
    3. If you have your coop wired up, then it’s likely you live in a place where you have at least one or two zero degree days per year if not more. When you live somewhere where the temps dip to zero then you need a heater in your coop, even if it’s just a small heat bulb. Do some asking around to see what farmers or chicken keepers in your area do in order to keep the flocks warm in winter. You may even have to have a water warmer for part of the year so your girls have fresh water instead of icicles.
    4. My wife likes to spoil our hens like they were extra kids or something, so our flock often enjoys warm oat groat mash and a lot of green vegetable scrapings as well as all the seeds we’ve saved from the lambsquarters to fatten them up. Fat hens are warm and generally healthier hens which equals less intervention from us and possibly a few more eggs over the darkest months. Extra corn if you feed your flock corn (we usually give extra peas and lentils since we don’t give our hens corn) is always a good idea during the darkest part of the year.
      Go and visit your hens when the weather permits over the winter and fall months. It’s a good morale booster for you and the chickens.

Do you have your own fall/winter checklist or recommendations? Please share in the comments field below 🙂

Until later,
John