Heating a Chicken Coop in Winter

Heating Your Chicken Coop
Share on Pinterest

As a chicken owner, one pressing matter that may be on your mind as the temperatures start to drop is chicken coop heating. Although chickens are very resilient creatures and able to survive some pretty harsh conditions, you need to understand that it’s in your best interest to keep them comfortable throughout the season. The happier and more comfortable your chickens are, the more eggs they’ll lay. Here are some suggestions for you to use to increase the warmth inside of your chicken coop.

Your Comfort Level Is Not the Same as a Chicken’s

First, you need to remember that chickens don’t require the same level of comfort that you do. What is cold to you may not be cold to them and vice versa. As long as you keep this in mind while you are arranging your chicken coop for the winter, your chickens will be fine.

Use Something Other Than Heat Lamps

Avoid the use of heat lamps inside of the coop. They pose a fire risk because there is no way for you to use them safely. The conditions and materials inside of the coop in addition to your chickens’ movements are all factors that can increase the risk of fire occurring from heat lamp use.

Instead, consider solar and natural lights. Depending on the setup of your chicken coop, you may be able to strategically incorporate them into its design. Keep in mind that any electrical light source you do decide to use needs to be connected to a generator. That way if an outage happens, you won’t have to worry about your chickens freezing to death from the extreme cold.

Hay and Bale Equal Toxic Insulation

Try to limit or not use bale and hay inside of the coop for insulation. Although this may seem like it is a practical idea, these materials can harbor mold and bacteria and create a very toxic and unsafe environment for your chickens.

Fresh Air Should Circulate Freely

In your effort to minimize drafts, you need to understand that sealing the coop up so that it is air-tight can be catastrophic for your chickens. Your chickens need lots of fresh air to circulate and prevent moisture buildup and mold growth. There are ways to seal the coop so you can maintain circulation without having to deal with the drafts.

Another issue that you’ll need to consider in regards to maintaining your coop during the winter is the water supply. It’s not always possible for you to prevent water from freezing in the winter time, and your chickens need around-the-clock access to it. A heated bucket that warms up just enough to keep your chickens water from freezing overnight may be something you’ll want to consider so you don’t have to get up several times a night to replace it.

There are plenty of ways for you to see to your chickens’ comfort during the winter. Consider their needs and goals and invest in the right processes and materials that allow you to meet both in the middle.

9 *Must Have* Coop Accessories

Must-Have Chicken Coop Accessories
Share on Pinterest

The best way to create a healthy, happy and productive environment for your chickens is to use the right chicken coop accessories. Usually it takes a bit of guess work and experimentation before you can find the right products to keep your chickens happy. However, you can’t go wrong with these nine must-have accessories for your chicken coop.

Security and Access Door

An automatic chicken door is the perfect accessory for the person who often forgets to close and lock their chickens in for the evening. Get one with GPS technology to make it easier for you to keep up with different time zones. Once configured, you don’t need to do anything else to manage it. It provides safe and easy access for your hens.

Natural Light

A solar operated chicken coop light makes it easier for you to keep your chickens warm and provide them with the right amount of sunlight so their egg laying schedule is not interrupted. You also won’t have to worry about increasing energy expenses from its use. Installation is easy, and you don’t need a professional to do it.

Fencing or Netting

One thing your chicken coop should not be without is fencing or aviary netting. You need to keep your chickens protected from outside predators like hawks and wild flocks. An aviary net and adequate fencing enables you to do so efficiently without putting your hens at risk.

Feeder

A true-to-size feeder. As tempting as it may be for you to fill your hen’s feeder with enough food for them to eat for a week, doing so can attract other animals and encourage mold and bacteria growth. Also, there is no point in wasting valuable chicken feed. You can just as easily cater to your chickens’ dietary needs by using a feeder that is small, portable and easy to keep clean.

Security Motion Sensor Lights

You’ll need more than the right fencing and nets to keep your prized chickens safe and secure. You should also consider placing motion security lights around your coop to use at night to help deter unwanted intrusions from other animals and alert you to the fact that there are predators in the yard.

Nesting

Since the nesting area is where all of the egg laying magic happens, you want to use the right nesting materials. There are several different ways you can set up their nesting areas. In my book “DIY Chicken Coops” you’ll find more info on how to select the right materials and setup.

Toys

It’s a well-known fact that too many hens in the coop is trouble. Invest in some toys to distract them and to keep them from messing with others. Consider items that are shiny and small enough for them to peck at.

Roosting Bars

No chicken coop should be without a few roosting bars. Think of them as tree branches that your chickens can hop onto and roost on whenever they’re in the mood. There is no need to have one for each chicken; you just need enough to accommodate the size of your coop.

Waterers

You don’t have to get all high-tech for your chicken coop waterer. You just need one that is large enough to accommodate all of your chickens and simple enough to maintain, clean and sanitize as needed.

Chicken Coop Cleaning: 5 Tips for a Healthier Coop

chicken coop cleaning
Share on Pinterest

While you might love raising chickens, you may not have as much affection for cleaning the chicken coop. The good news is that ChickenCoopGuides.com has a few tips for chicken coop cleaning without cutting corners or putting the health of your birds at risk. So be sure you check out this guide before you next go to scoop out the coop.

Use Hay

Rather than using only dirt to cover the bottom of the chicken coop, add barn lime and hay to the dirt to keep bacteria at bay and reduce health complications in your chickens. The great thing about hay is that it doesn’t lead to a buildup of dust, and another great thing is that it’s inexpensive. As for the barn lime, it helps chickens create shells for their eggs.

Be As Thorough As Possible

When it’s time to take care of shavings, manure, feathers and anything else inside of your chicken coop, it’s vital that you’re thorough. White vinegar and hot water make for a great combination, and you can also hose down the coop to spray out dust and make it easier to scrape away stubborn spots. Just be sure you let the coop fully air out once you’re done cleaning.

Use Dropping Boards

You know you’ll find plenty of droppings in the coop, so you might as well do what you can to make this cleanup step easier. Dropping boards are easily installed under the coop and are great for catching droppings and keeping bedding cleaner for longer. Know that you’ll still need to give the dropping boards a good scrubbing and cleaning every now and then. Once you start using dropping boards, you’re sure to notice how much money you save on bedding, not to mention the time it takes to install bedding.

Keep a Duster Handy

While hay can go a long way in keeping coop dust at a minimum, there’s bound to be at least a little bit, especially if you have young chicks. It’s a good idea to buy a high-quality duster specifically for the coop. Wipe down the window dressings and nest box curtains, and give the walls a dust down whenever they need it. Each time you do this, you’re making it easier on yourself when the time comes to perform your deep cleaning of the coop.

Use the Deep Litter Method

Are you raising chickens in a cold climate? The deep litter method is exactly what you and your birds need to remain comfortable. What’s so unique about this method is that it makes it easy for your litter to compost over time, and as an added bonus, the buildup keeps the chickens warm during the colder months of the year.

The deep litter method requires you to spread barn lime, which also helps discourage flies from buzzing around. Next, add anywhere from four to six inches of hay. Make it a weekly habit to mix up the litter and add more lime and hay as needed.

While these tips may not make it a joy to clean the chicken coop, they can most certainly make it easier.

Gary Adrian’s Chicken Coop Project

Share on Pinterest

I absolutely love it when fans and followers sends through photos of their successful coop project. Here’s one recent example that I just had to share with you.

Gary in Iowa has been keeping us posted on his coop’s progress since May and it’s now complete and the flock has moved in. He used the Gambrel plan and made a few modifications to fit the space he had to work with. He then insulated the floor with 2” ridged insulation to keep the heat in and lined the walls and floors with Fiberglass Reinforced Panels (composite material used in car washes, hospitals, commercial kitchens and laboratories) for the walls and floors, which won’t rot or support mold or mildew.

Gary points out by using this he can just pressure wash it when it’s time to clean out the coop. As you can see in the photos, he divided up the inside so he’s got room for storing the feed and his cleaning supplies – which I think is a great organizational idea! The coop’s got heat and fans and notice how he built it with a tree nearby to take advantage of the shade in the summer. He installed a barrier underground around the run to keep out raccoons and coyotes.

I’m sure we all agree that this coop is a true beauty!

Gary Adian's Coop

Gary Adian's Coop

Gary Adian's Coop Gary Adian's Coop Gary Adian's Coop Gary Adian's Coop


Chicken Coop Insulation and Ventilation Options

Share on Pinterest

Now that winter is officially here, if you haven’t already (and you really should have done by now!) you need to look at your chicken coop insulation and ventilation. This is a place where everyone seems to ‘know’ the answer and yet there are a lot of wrong answers. I’m hoping to clear up some of the confusion in this area for everyone. There are a few things that you MUST do.

Have a DRY coop

Currently a good portion of the US is rainy and wet and expected to stay so for a few months. Add cold to that and you can have some very unhealthy chickens.

The cold, wet air can encourage illnesses of the head and lungs such as flu, cold, bronchitis, cough, or some of the more ‘official’ sounding chicken diseases like coryza (a bacterial cold bug). But more than just illnesses, the damp conditions will breed a horde of fungi and molds that can be very dangerous or even fatal for your flock. To prevent this, start by removing anything that can serve as a breeding ground for mold or fungus inside the coop.

  • Hay and straw usually come with their own types of molds and fungi so if they start to get damp, scrape and dump it. In wet weather I usually don’t even bother putting it in the coop to begin with.
  • Water dishes that have been repeatedly filled but never washed. Slimy mold tends to build up and then the hens are actively drinking it. Yuck.
  • In places where it is often rainy (like the Pacific Northwest) or has a long rainy season (Florida and the low areas) it’s best to make a coop that does not have insulation between the walls because unless you spray it with nasty chemicals that can outgas into your coop, it’s going to get damp and because of lack of air circulation it will stay damp which turns into mold and mildew. Possibly even the dreaded black mold that is guaranteed to get into the lungs of your flock and YOU!

Have a TEMPERATURE STABLE coop

So let’s say that in the summer your coop has good airflow, catches the breezes just right, and stays nice and dry even in the rain. Your hens are happy and productive, giving you a lot of eggs because you also give them good feed and access to fresh water and insects.

Then winter comes . . .

This same coop that worked so well during the summer months becomes a nightmare. It doesn’t keep the drafts out completely. The plastic you put up over it catches the wind and frequently rips pieces of the coop or blows away. Your hens are freezing cold and huddled together so tightly that you don’t think you could pry them apart with a stick. The water is frozen in the dish.

What do you do?

Have a FUNGUS/MOLD-FREE coop

So your hens are warm and cozy. They’ve snuggled up together against a big hay bale to keep warm and there are enough hens to generate heat that prevents them from getting cold in the 20F temperatures outside. But the air grows moist from a combination of spilled water, ammonia fumes from the chicken waste, and no ventilation. Soon the hay bale wilts and the fungal spores start to grow from inside. Even the walls themselves are growing mold and mildew from the moist conditions. The chickens start to get sick from the damp, moldy air and the fumes from their own waste.

Or you could take those warm, cozy hens you started with and keep them that way by making sure there is a good airflow from bottom to top (cool air comes in on the bottom and carries away the air that is too moist or too warm up through the roof). You can use hay bales if you want, but keep in mind that they carry a lot of fungi and molds so it’s critical to keep the air the perfect balance between moist and dry or you’ll have problems. We’ve already explored how the the temperature variations can cause problems, as well as the moisture, but try taking some additional steps to keep your flock safe in the very likely event that you aren’t perfect and will never have the perfect balance of temperature and moisture.

  • When you do seasonal cleaning, spray the walls with a light solution of vinegar and lemon, lavender, or thyme oil (thyme oil was the original Lysol…). This will help prevent mold and mildew.
  • Paint the interior of your coop at seasonal cleaning time with mold and mildew resistant paint. They have a low VOC paint that is safe for animals and humans.
  • Put a couple of drops of apple cider vinegar in your chicken water to help combat mold or fungal growth where the water gets spilled.
  • Stay on top of chicken waste, especially in the winter.
  • If you serve your flock a hot mash or peelings for a treat, make sure they eat it all and if they don’t make sure it’s cleaned out of the coop within two days.

There are several options for insulation that work for coops depending on your needs. If you live in a hot, dry area then the type of insulation you need is drastically different from someone who lives in a cold, damp climate.

HOT & DAMP (Florida, Coastal South, etc) Insulation isn’t needed, but ventilation is a must to prevent mold and fungus.
HOT & DRY (Southwest US) Insulation isn’t needed as much. Focus on keeping flock hydrated.
COLD (or COOL) & DAMP (Pacific Southwest) Light insulation since temperatures rarely go below 25F. Ventilation is important to prevent illness, mold, and fungus.
COLD & DRY (Midwest states) Insulation required, ventilation type depends on amount of chickens in coop. May need additional heat source, but usually a heated water dish will provide enough warmth unless you have very few chickens or a very large coop.
EXTREME COLD (Upper Midwest, Canada) Insulation required, ventilation depends on amount of chickens in coop. Will certainly need additional heat source.

Roll insulation works really well, but to prevent mold problems inside the walls where I can’t see it, I like to use a safe roll insulation like bamboo or recycled denim. I’m not really concerned that way if the hens peck at it a little. Just staple it up on the walls, then cover the walls with cut to fit chicken wire or micromesh

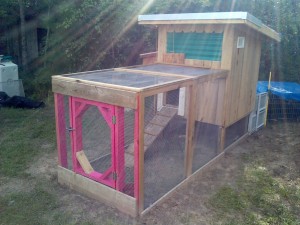
Photo by: fishermansdaughter

Need Help Building Your Coop? Don’t Have Carpentry Skills?

Share on Pinterest
There are no images.

I get emails pretty often from folks who want to build a chicken coop of their own but just don’t have the skills or the time or even the ability due to age or disabilities. To them, I generally give one big suggestion that I am going to share now: time banking.

If people have even heard of time banking at all they generally think that they couldn’t possibly have anything to contribute or that they just don’t have the time to participate. 99.99% of the time you’re dead wrong to think this and it’s just feeding yourself negativity. Think positive!

hands after working

First I should backtrack and address what a time bank is and how to find one. Wikipedia defines a time bank as: the practice of reciprocal service exchange which uses units of time as currency.

So a time bank in practical terms is a group of neighbors who get together to exchange labor with each other for credits in the form of hours. So let’s say I go and build a coop for a local dentist who is part of the time bank exchange and I spend 10 hours of time building that fancy coop for him, then I have a credit of 10 hours in my time bank account that I can ‘spend’ with anyone. In that instance, I used those credit hours to get some dental work done at a big discount (only charged for materials) and I got my wife a well-deserved massage with just enough left over to have free babysitting for our anniversary. See how it works? Most people don’t earn big chunks like I did that time – it’s usually in drips and drabs – but they add up!

To find a time bank in your area that is already established, or for information about starting one locally, go to timebanks.org. If you’re outside of the US, I believe there are links to the international organizations on that website but you can also google time banking in your country for more information.

Back when my wife and I first started getting into time banking, perhaps 3-4 years ago, my wife didn’t want to even bother with it because she didn’t want to just be a ‘taker’. In her mind, she had no skills or anything of value to contribute. After the first meeting she sat down and started thinking of all the things she could do as “just as a housewife”:

    1. She could drive using our van. People just needing a ride from point A to point B gave her a call or sent an email if they needed to use her ‘time’. She even picked up the local time bank coordinator’s kids from day camp for a week and earned 15 hours of time banking time for it!
    2. She can cook. Some folks worked 60 or more hours a week and didn’t want to eat out every night so she offered to make them nutritious freezer meals. They bought the materials and she supplied the time. It worked out great!
    3. One single mother in our group needed babysitting one day a week for a month while her mother was in the hospital. My wife kept an eye on that little one as playmate to our own very easily and happily and earned time while doing it.
    4. Someone in the group wanted to learn how to knit and sew so she taught them.
    5. Another person wanted to know how to can vegetables and make jam. Again, she taught them.
    6. Our kids came along one day and earned family hours by helping decorate for a bar mitzvah. Then they were invited to stay and take part which wound up being a cool bonus and a learning experience for everyone.
    7. The other time our kids helped was by going to the local nursing home and reading to one member’s sick mother.
    8. I helped folks weed their gardens and paint their fences among other tasks like building chicken coops.

So as you can see, even a tiny child can contribute to a time bank. And yes, you’ll definitely get a lot out of it for yourself. If you’re older or disabled you can even probably find someone locally who can build that coop for you or maybe help you put up a chicken run. But more than that, time banking is a great way to get involved with your community and make new friends.

I do recommend that everyone who wants their own coop to at least try to build it themselves first and turn to outside sources for help when they get stuck. Most of the plans I sell are very easy to use and made with the beginner in mind. There is pride and satisfaction to be had when you manage to do something yourself. But for when you do get stuck . . . I definitely recommend time banking! 😉

728x90

How To Find Cheap and Free Construction Materials (for any purpose!)

Share on Pinterest
There are no images.

So we’ve all been there: money is tight, but we have big plans to help our family with various projects (such as chicken coops). We look at the costs involved for the building supplies and we think to ourselves ‘we just can’t afford this right now!’

Paying attention to detail

This type of negative thinking prevents a lot of people from fulfilling their dreams of building gardens, sheds, chicken coops, and even just regular ol’ home improvement projects. Below I have outlined several tips and suggestions for getting around that so you can move to the construction phase of your big ideas quickly and easily.

    1. ASK for cheaper wood! Go to a lumber yard and speak to the manager or owner. You can also call, but the old saying ‘a bird in the hand is worth two in the bush’ so they’re going to see a potential customer RIGHT in front of them and be more willing to play Let’s Make A Deal than if you call. Ask them if there is any hardwood or construction lumber they would like to sell quickly and cheaply. Be careful with wood marked as ‘infested’. If you get wood which is marked as this, generally it can be frozen or sealed to kill any bugs in it, but I wouldn’t risk it personally. Check for insect activity before purchasing. Generally a smart manager will give you a good deal on wood they can’t sell for various reasons. And if you happen to run into a not-so-smart manager . . . move on. There are a million lumber yards so don’t waste your time. Most managers and owners know that you’re really doing THEM the favor by taking that wood off of their hands. It would cost more for them to dispose of it and this way they’re not losing as much money. It’s a two-way partnership.


    1. A lot of people will turn their noses up at wood that has knot holes and imperfections in it so ask for wood that people have returned (this works for lumber yards as well as your major hardware stores). It’s generally still good wood, but it didn’t meet their high standards of ‘pretty’. Sometimes entire bundles will be marked as rustic or second grade lumber when in reality only a few pieces on the top are imperfect. Other people’s snobbery is your gain!


    1. Don’t be a jerk. No one wants to talk to or give anything to a person who has a chip on their shoulder or an entitled attitude. Take a page from my wife’s book of Southern Charm and eat a spoonful of sugar before talking to anyone about getting free or cheap items. A pleasant tone of voice and a friendly smile goes a long way toward getting what you want in a subjective agreement that is usually off the books.


    1. Check the dumpsters around places under construction or behind hardware/lumber stores. I don’t recommend actually going inside the dumpster, but good items are generally left right there either on top or in front of dumpsters frequently. Think I’m joking? Years ago when I worked for a well-known hardware store chain that begins with L, we often threw away entire stained-glass doors, sheets of drywall that was missing a corner, charcoal grills, tons of good lumber, a million and one old wood pallets that could be used for a ton of things, and many items that came back from deliveries since we had a policy of removing the old appliances when delivering new ones. Many things were demos that we couldn’t actually sell so we had to throw them away! And when doing construction, companies will often purchase more than they need and the rest gets tossed. Just finding places to go ‘cruising around’ will be worth the weight in gold later. Things like this really irritate me because Western culture is so focussed on the ‘bigger is better’ mentality that good items are thrown away. It’s wasteful, but you can benefit from that and so can your chickens! The best part is that almost no one can tell that you got something from next to a dumpster unless you tell them so if you’re still nervous about keeping up appearances, don’t be.


    1. Visit the recycling center in your area and question them about construction items or other bits and pieces which may work for you. Old doors and windows, etc. Usually this stuff is free for the taking and almost any plan or blueprint you read can be adjusted easily to accommodate a recycled window or door instead of building one from scratch.


    1. Freecycle and Cheapcycle are both great groups to join on yahoogroups. Check out the rules for your local group, but usually you can both browse the ads and then post your own want ad for things you’re looking for.Craigslist has a dubious reputation these days, but if you follow basic safety rules you can generally sniff out great deals. People often want things picked up for free instead of paying to have it taken to the dump so they’ll happily give you extra construction items they no longer need. Just look for ads or post one of your own there.Need cheap paint? Go to any paint store or major hardware store and ask where they keep the mistakes. People often not only return paint because it isn’t exactly the right color for them, but the mixers also make mistakes sometimes, too. So it’s just a matter of sorting through their shelf to find what you want. When I do this I make a note on an index card of what type of paint finish it is, what brand, and then dip half the card and dry it so if I want to go back and get that exact same color again I have a paint chip for a color match with all the information on it. It worked great when I was repainting our daughter’s bedroom!


    1. Look for ads where people are wanting old barns torn down. You might not even have to do all the work, but you can sometimes lend a hand in exchange for as much of the wood as you can carry. The wood is generally older and well-seasoned so it’s great to use for chicken coops, garden sheds, and dog houses!


Until later,
John

728x90

Ken Lang’s Chicken Coop Project

Share on Pinterest

Hi folks! An awesome guy named Ken Lang contacted me recently and let me know about the brilliant things he’s doing in his back garden. I asked him to write about it and provide plenty of step by step pictures.

“My name is Ken Lang and my wife’s name is Tina. We have been thinking about raising chickens for a long time. Our relatives eventually made up our minds for us. My sister-in-law purchased four Ameraucana chicks for us. Three out of four were killed by predators (coyotes and raccoons) This is when I decided to build a 99.9% predator proof coop. I lost the plan I ordered from John, but here is what I based my coop on. As you can see in the following article, I made a few changes, to fit my needs.”

coop-300x300
“I started with 4×6 posts, stapled hardware cloth to it, and added 1×6 to the bottom for strength. Then I dug ditches for two reasons: first to level the floor and second I filled them with concrete to discourage digging.”

coop-7-300x225

“Everything is screwed together to allow for somewhat easy removal. Next, I started the framing.”

coop-2-300x225
“If you look real close, this is where I installed the roost. Also I framed in the place where the nesting boxes will be later installed. (left side) Again, everything is screwed together.

Then, I put the siding and roofing on. We had some scrap cedar siding and some left-over roofing tin. This saved us a lot of money!”

coop-3-300x225
“Then I started on the run. We had some 1’ x 2” lumber left over from a cabinet shop. Did I mention, I am a cabinetmaker? You don’t have to be a cabinetmaker to do this. I made 3’ x 4’ panels from the lumber and hardware cloth, screwed them together with a 1” x 6” backer for strength, and made the run.”

coop-4-300x225
“If you look close at the door, it is on a pulley system that is activated from the outside. There is also a door on the back side. It is double-locked to keep predators out. As you may know, raccoons are very smart and can figure out how to open just about anything.”

coop-6-300x225
“This is our finished coop. I estimate this coop would cost about $375.00 to build if you have to buy all materials, but we had a lot of scrap lumber so we only spent about $250.00.”
 

coop-5-300x225
“We have since started adding on to the run. We learned that when you get new chickens they have to be acclimated slowly to establish a pecking order.”

ext-3-300x225
“I just added an extra one to what was already there. I cut a hole to match the opening in the left-over cabinet front found in my scrap pile and add a door. This will allow for separation at first, and then you can open the door when the new girls start getting along with the old girls.”

ext-2-300x225
“Just another view. This part only took me a day to complete. The girls love it and it is also 99.9% predator proof. I know this looks nothing like the original plan, but I had to improvise to suit my needs. Almost all dimensions match the plan. That is the beauty of it, you can use John’s plans and suit them to your personal needs. Thanks again John!”

ext-300x225

 Ready to start your very own chicken coop project? Just click here to get your hands on my world-famous plans 🙂

ChickenCoop_LargeRectangle_v4_R4_AS


Chicken coop inspiration…

Share on Pinterest
There are no images.

I found this video online a few days ago and I thought I’d share it with you…

It shows a guy giving a tour of an fantastic coop he’s built that’s actually very similar to our “Chicken Shed” – one of the coop plans you get access to when you invest in a ChickenCoopGuides membership.

He also shares some really useful tricks and tips and I hope this video will give you some inspiration and motivation to finally go ahead and build your own coop.

Want a coop similar to the one in the video? Claim your membership today, download the “Chicken Shed” plan, and if you’re fast you could have a beautiful coop in your backyard before the end of this weekend!

Click here to invest in a CCG membership right now!

We Just Added 3 New Coops…(including a mobile coop!)

Share on Pinterest

We recently added 3 new awesome chicken coop plans to our collection available to our members.

Here below is the first new addition: “The Mobile Coop”…

If you haven’t read my post from yesterday where I outline the amazing benefits of a mobile coop, read it here.

If you would like to sign up and get access to these new plans PLUS all existing plans, click here to sign up now!

The Mobile Coop

coop1

What Is Included In This Plan?

– Full color plans, ready to print
– 2 measurement metrics (cm/m & feet/inches)
– Step-by-step-instructions
– Complete lists of materials & tools needed

Plan Description

The Mobile coop is designed for 5-8 chickens and offers spacious nesting boxes, an attached run below the coop and the ease and convenience of being able to move around to different locations with just a little help. Only 4×8′, the compact design offers a cute little hut to raise a few chickens in or the convenience of an excellent hot box with to raise chicks! The coop access is accessible with a little access panel in the floor and an easy-to-make ladder.Our full color, step-by-step plans offer you the ultimate in convenience for constructing a rough frame, finishing is up to you! Make it your own with paint, veneers and materials to match your preferences! The mobile coop is excellent for anyone with a hobby peck looking to keep a small amount of chickens safe and secure!

Coop Combo

coop3-300x252

What Is Included In This Plan?

– Full color plans, ready to print
– 2 measurement metrics (cm/m & feet/inches)
– Step-by-step-instructions
– Complete lists of materials & tools needed

Plan Description

The Coop Combo combines the coop, run, roost and nesting boxes into a convenient 8×16’ package! The Coop Combo offers a large, 12×8’ coop area, 4×8’ separated storage area, ventilated bottom panels, easy accesses for clean outs and convenient poo pans for waste collecting. Smaller chicken accesses allow for letting your poultry out should you want free-range roaming! Attached nesting boxes offer exterior access for ease in egg collecting. Made of sturdy 2×4 wooden supports, and offering a sturdy scissor truss configuration, the Coop Combo offers plenty of head height as well as over-head storage capacity! Plenty of windows give more than enough light and ventilation, depending on the weather!

If you have small space but want a great starter coop, you cannot go wrong with the Coop Combo! The frame is completely electrical ready and follows all major construction guidelines. Our easy to follow, step-by-step, full-color plan sets will have your birds resting comfortably within a few short days!

Mini Cluckimate

coop2-300x226

What Is Included In This Plan?

– Full color plans, ready to print
– 2 measurement metrics (cm/m & feet/inches)
– Step-by-step-instructions
– Complete lists of materials & tools needed

Plan Description

The Mini Clucktimate Coop is excellent when it comes to providing your precious poultry with everything they need! With large, exterior nesting boxes and a respectable 12×9′ floor plan, the Clucktimate Coop is sure to make your poultry farming a memorable and pleasant experience for all! With our unique nesting box design, nesting boxes are exterior, accessible from the outside and easy to clean! No more stooping, hunkering and bending! Simply open the easy access hatch and scoop out the old and put in the new (straw that is)!

Our full color, step-by-step plans are easy to read, simple to understand and they lay out everything you will need to know to build a gorgeous, sturdy backyard chicken house to last a lifetime! With a full top vent and a classical hip roof the Clucktimate Coop is sure to please the eyes and the pocketbook! Don’t pay up to $10,000 for a coop of this caliper! Build it yourself and save, literally, thousands!The Clucktimate Shed plans offer such amenities such as 1) Detailed,step-by-step, full-color diagrams! 2) Details on building simple doors and windows from scratch! 3) A fully enclosed chicken run compatible with the Clucktimate Coop! 4) General instructions on cutting rafters! 5) A full material list (to make shopping easier) and 6) did we mention our full color, step-by-step instructions? Some things are worth repeating!Like any of these new plans?